There’s something magical about homemade ice cream. The texture is creamier, the flavors are fresher, and you have complete control over what goes into it. But what if you don’t own an ice cream maker? The good news is that you absolutely don’t need one. With a few simple ingredients and basic kitchen tools, you can create rich, smooth, and delicious ice cream right at home.
In this comprehensive guide, you’ll learn multiple foolproof methods for making ice cream without special equipment. Whether you want a classic vanilla base, a no-churn shortcut, a dairy-free alternative, or a creative flavor twist, this guide will walk you through every step.
Why You Don’t Need an Ice Cream Maker
An ice cream maker works by churning the mixture while it freezes. Churning incorporates air and prevents large ice crystals from forming, which gives ice cream its smooth texture. Without churning, ice crystals can grow and make the ice cream icy instead of creamy.
However, you can mimic this process in several ways:
- Manually stirring during freezing
- Whipping cream to incorporate air
- Using condensed milk for stability
- Blending frozen ingredients
- Shaking the mixture in a bag
These techniques break up ice crystals and add air, helping you achieve a smooth, scoopable texture without expensive equipment.
The Science Behind Creamy Ice Cream
Before diving into methods, it helps to understand what makes ice cream creamy.
Three key factors determine texture:
1. Fat Content
Heavy cream contains fat, which helps create richness and smoothness. Higher fat reduces iciness.
2. Sugar
Sugar lowers the freezing point, keeping the mixture softer and easier to scoop.
3. Air
Incorporated air makes ice cream light rather than dense and solid.
When making ice cream without a machine, your goal is to balance these three elements.
Method 1: The Classic No-Churn Ice Cream (Easiest Method)
This is the most popular and beginner-friendly way to make ice cream without an ice cream maker.
Ingredients
- 2 cups heavy whipping cream (cold)
- 1 can (14 oz) sweetened condensed milk
- 1 teaspoon vanilla extract
- Pinch of salt
Instructions
- In a large bowl, whip the cold heavy cream using a hand mixer or whisk until stiff peaks form. This step incorporates air.
- In a separate bowl, combine sweetened condensed milk, vanilla extract, and salt.
- Gently fold the whipped cream into the condensed milk mixture. Do not overmix, or you will deflate the air.
- Transfer the mixture into a loaf pan or airtight container.
- Cover with plastic wrap or a lid.
- Freeze for at least 6 hours or overnight.
Why This Method Works
Sweetened condensed milk contains sugar and milk solids that stabilize the mixture. Whipping cream adds air, mimicking churning. The result is surprisingly smooth and creamy.
Texture Tips
- Make sure your cream is very cold before whipping.
- Fold gently to preserve air.
- Freeze in a shallow container for quicker, more even freezing.
Method 2: Stir-and-Freeze Method (Traditional Custard Style Without Machine)
This method produces a more traditional ice cream flavor.
Ingredients
- 2 cups whole milk
- 2 cups heavy cream
- 3/4 cup sugar
- 4 egg yolks
- 1 teaspoon vanilla extract
Step-by-Step Instructions
- Heat milk and cream in a saucepan over medium heat until warm but not boiling.
- In a bowl, whisk egg yolks and sugar until pale and thick.
- Slowly pour warm milk mixture into the egg mixture while whisking.
- Return everything to the saucepan.
- Cook on low heat, stirring constantly, until it thickens enough to coat the back of a spoon.
- Remove from heat and stir in vanilla.
- Let the custard cool completely in the refrigerator.
- Pour into a freezer-safe container.
- Freeze for 45 minutes.
- Remove and stir vigorously with a fork or whisk to break ice crystals.
- Repeat every 30–45 minutes for about 3–4 hours.
Why Stirring Matters
Stirring breaks up ice crystals as they form, creating a smoother consistency. It mimics the churning action of a machine.
Pro Tip
Use a hand mixer for stirring to make the texture even smoother.
Method 3: The Ice and Salt Bag Method (Fun and Fast)
This is perfect for kids or small batches.
Ingredients
- 1/2 cup milk or cream
- 1 tablespoon sugar
- 1/4 teaspoon vanilla
Supplies
- 1 small zip-top bag
- 1 large zip-top bag
- Ice cubes
- Rock salt
Instructions
- Combine milk, sugar, and vanilla in the small bag. Seal tightly.
- Fill the large bag halfway with ice.
- Add 1/3 cup rock salt to the ice.
- Place the small bag inside the large bag.
- Seal the large bag.
- Shake for 5–10 minutes until thickened.
How It Works
Salt lowers the freezing point of ice, making it colder. The extremely cold environment freezes the mixture while shaking incorporates air.
Method 4: Blender Ice Cream (Quick and Healthy Option)
This method works especially well with frozen fruit.
Basic Banana Ice Cream
Ingredients
- 3 ripe bananas (sliced and frozen)
Instructions
- Freeze banana slices for at least 4 hours.
- Blend until smooth and creamy.
- Serve immediately for soft-serve texture or freeze for firmer ice cream.
Why It Works
Bananas become creamy when blended because of their natural sugars and fiber. No added cream or sugar is needed.
Variations
- Add peanut butter for richness.
- Add cocoa powder for chocolate flavor.
- Add frozen berries for fruity ice cream.
Method 5: Whipped Cream and Milk Shortcut (No Condensed Milk)
If you don’t have condensed milk, try this alternative.
Ingredients
- 2 cups heavy cream
- 1 cup whole milk
- 3/4 cup sugar
- 1 teaspoon vanilla
Instructions
- Whip heavy cream until soft peaks form.
- Dissolve sugar in milk.
- Fold milk mixture into whipped cream.
- Freeze for 6–8 hours.
This method may be slightly less stable but still produces creamy results.
Flavor Ideas to Elevate Your Homemade Ice Cream
Once you master the base, the possibilities are endless.
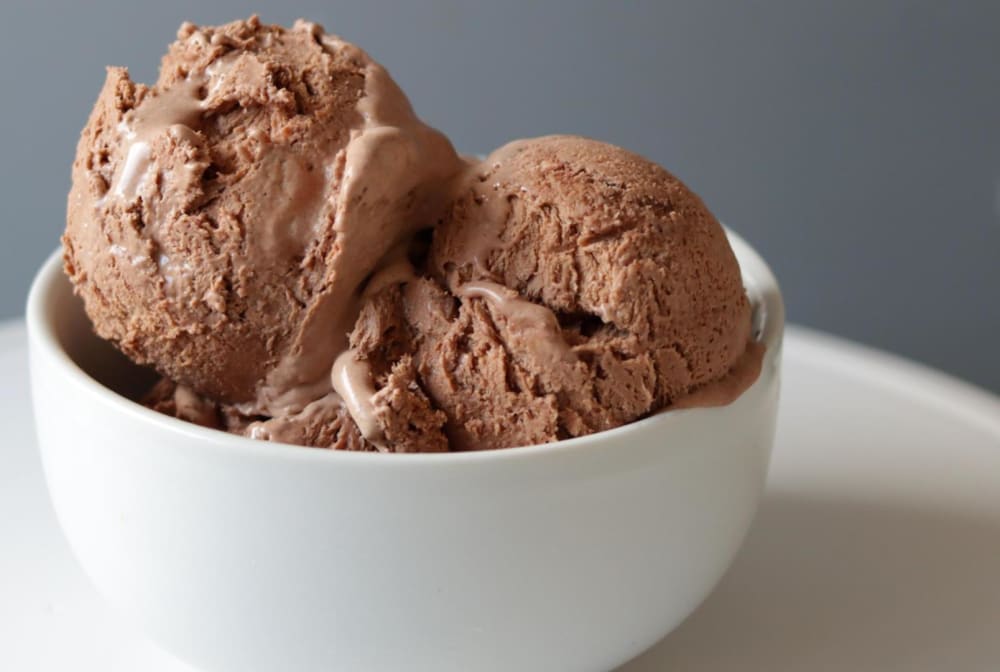
Chocolate
Add 1/3 cup cocoa powder or melted chocolate to the base.
Strawberry
Blend 1 cup fresh strawberries with sugar and fold into the mixture.
Cookies and Cream
Fold in crushed chocolate sandwich cookies.
Salted Caramel
Swirl caramel sauce and a pinch of sea salt into the base.
Coffee
Add 1 tablespoon instant espresso powder dissolved in warm water.
Dairy-Free and Vegan Ice Cream Options
You don’t need dairy to make creamy ice cream.
Coconut Milk Ice Cream
Ingredients
- 2 cans full-fat coconut milk
- 1/2 cup sugar or maple syrup
- 1 teaspoon vanilla
Instructions
- Mix all ingredients until smooth.
- Freeze and stir every 30 minutes for 3 hours.
Coconut milk’s high fat content mimics heavy cream.
Cashew Ice Cream
- Soak 1 cup cashews overnight.
- Blend with coconut milk, sweetener, and vanilla.
- Freeze using stir-and-freeze method.
The result is incredibly smooth and rich.
How to Prevent Ice Crystals
Ice crystals are the biggest challenge without a machine. Here’s how to avoid them:
- Use high-fat ingredients.
- Add enough sugar.
- Stir during freezing if not using no-churn method.
- Cover surface with plastic wrap touching the ice cream.
- Freeze quickly in shallow containers.
Storage Tips
Homemade ice cream lacks commercial stabilizers, so it can harden more in the freezer.
To keep it scoopable:
- Store in airtight containers.
- Place parchment or plastic wrap directly on the surface.
- Let sit at room temperature for 5–10 minutes before scooping.
Common Mistakes to Avoid
Overmixing Whipped Cream
This deflates air and makes ice cream dense.
Skipping Chill Time
Custard must cool fully before freezing.
Using Low-Fat Ingredients
Low fat leads to icy texture.
Not Sealing Properly
Air exposure causes freezer burn.
Making Soft-Serve Style Ice Cream
If you prefer soft-serve texture:
- Blend frozen mixture after partially freezing.
- Serve immediately.
- Avoid freezing overnight.
You can also pipe soft-serve using a piping bag for a professional touch.
Scaling for Parties and Gatherings
For larger batches:
- Double or triple no-churn recipe.
- Use multiple shallow pans.
- Freeze overnight.
- Add mix-ins just before freezing to maintain texture.
For events, consider pre-scooping into cupcake liners and refreezing.
Creative Mix-Ins and Swirls
Timing matters when adding mix-ins.
Add them after folding the base but before freezing.
Popular mix-ins:
- Brownie chunks
- Chocolate chips
- Toasted nuts
- Crushed candy bars
- Fruit compotes
For swirls, layer ice cream and sauce alternately and gently drag a knife through.
Healthier Alternatives
If you want lighter options:
- Use Greek yogurt in place of some cream.
- Sweeten with honey or maple syrup.
- Use frozen fruit as base.
- Reduce sugar slightly but not too much.
Balance is key. Sugar plays a structural role.
Turning Ice Cream Into Desserts
Once you’ve mastered homemade ice cream, use it in:
- Ice cream sandwiches
- Milkshakes
- Affogato (ice cream with hot espresso)
- Ice cream cakes
- Sundaes
Homemade ice cream enhances every dessert it touches.
Frequently Asked Questions
Can I use half-and-half instead of heavy cream?
Yes, but texture may be less rich.
How long does homemade ice cream last?
Best within 1–2 weeks for optimal texture.
Why is my ice cream rock hard?
Not enough fat or sugar. Let it soften before serving.
Can I reduce sugar?
Yes, but too little sugar causes iciness.
Final Thoughts
Making ice cream without an ice cream maker is not only possible but incredibly rewarding. With simple ingredients and basic kitchen tools, you can create everything from classic vanilla to dairy-free coconut, from rich chocolate to fruit-based soft serve.
The key lies in understanding texture: incorporate air, use enough fat, and control freezing. Whether you choose the ultra-simple no-churn method, the traditional custard approach, or the fun ice-and-salt technique, each method opens the door to endless flavor possibilities.
Homemade ice cream allows you to experiment, customize, and create something uniquely yours. Once you try it, you may never feel the need for a machine again.
Now that you know how to make ice cream without an ice cream maker, it’s time to head to your kitchen and start churning, stirring, shaking, or blending your way to creamy perfection.