Homemade ice cream is one of life’s simplest yet most rewarding culinary pleasures. Creamy, rich, endlessly customizable, and free from unnecessary additives, it offers a level of freshness and flavor that store-bought versions often can’t match. Whether you prefer classic vanilla, indulgent chocolate, fruity sorbets, or creative mix-ins like cookie dough and caramel swirls, learning how to make homemade ice cream gives you complete control over texture, sweetness, and ingredients.
In this comprehensive guide, you’ll discover everything you need to know about making ice cream at home — from understanding the science behind it to mastering different methods, choosing ingredients, and troubleshooting common issues.
Understanding the Basics of Ice Cream
Before diving into recipes, it helps to understand what ice cream actually is.
At its core, ice cream is a frozen emulsion made from:
- Cream
- Milk
- Sugar
- Flavorings
- Sometimes eggs
The goal is to create a smooth, creamy texture with tiny ice crystals and enough air incorporated to prevent it from becoming dense and icy. This balance of fat, sugar, water, and air is what gives ice cream its characteristic mouthfeel.
The Science Behind Creaminess
Several factors contribute to smooth homemade ice cream:
- Fat content: Cream adds richness and reduces iciness.
- Sugar: Lowers the freezing point and keeps the texture soft.
- Air incorporation (overrun): Churning adds air for lightness.
- Stabilizers: Egg yolks or natural thickeners improve texture.
- Freezing speed: Faster freezing creates smaller ice crystals.
Understanding these elements will help you produce consistently great results.
Essential Ingredients for Homemade Ice Cream
Making ice cream doesn’t require many ingredients, but quality matters.
1. Heavy Cream
Heavy cream is the backbone of rich ice cream. It typically contains 35–40% fat, which gives ice cream its luxurious texture.
2. Whole Milk
Whole milk balances the fat content and adds volume. Using low-fat milk may result in a more icy texture.
3. Sugar
Granulated sugar is most common. It sweetens and affects texture by preventing the mixture from freezing too hard.
4. Egg Yolks (Optional)
Used in custard-style ice cream, egg yolks act as emulsifiers and create a thicker, creamier result.
5. Flavorings
Common flavorings include:
- Vanilla extract
- Cocoa powder
- Melted chocolate
- Fresh fruit puree
- Coffee
- Nuts
- Caramel
You can experiment endlessly once you understand the base.
Two Main Types of Homemade Ice Cream
There are two classic approaches to making ice cream at home.
1. Philadelphia-Style (No Eggs)
This style is simpler and faster because it doesn’t require cooking a custard.
Characteristics:
- Lighter texture
- Pure dairy flavor
- Easier and quicker to prepare
Basic formula:
- 2 cups heavy cream
- 1 cup whole milk
- 3/4 cup sugar
- Flavoring of choice
Everything is mixed together and churned.
2. French-Style (Custard Base)
This version includes egg yolks and requires cooking.
Characteristics:
- Richer and creamier
- Thicker texture
- More stable structure
Basic formula:
- 2 cups heavy cream
- 1 cup whole milk
- 3/4 cup sugar
- 4–6 egg yolks
- Flavoring
The egg yolks are tempered and cooked gently to create a custard before churning.
How to Make Ice Cream with an Ice Cream Maker
Using an ice cream maker is the easiest and most consistent method.
Step 1: Prepare the Base
If making Philadelphia-style:
- Whisk together cream, milk, and sugar until dissolved.
- Add flavoring.
- Chill the mixture in the refrigerator for at least 2–4 hours (overnight is best).
If making custard-style:
- Heat milk and cream in a saucepan until steaming but not boiling.
- Whisk egg yolks and sugar in a separate bowl.
- Slowly pour warm dairy into the yolks while whisking (this is called tempering).
- Return mixture to the stove and cook gently until it thickens enough to coat the back of a spoon.
- Strain and cool completely.
- Refrigerate until fully chilled.
Chilling is crucial for proper churning.
Step 2: Churn
Pour the cold mixture into your ice cream maker and churn according to manufacturer instructions. Most machines take 20–30 minutes.
During churning:
- Air is incorporated.
- Ice crystals are broken down.
- The mixture thickens to a soft-serve consistency.
Step 3: Freeze to Firm Up
Transfer churned ice cream to an airtight container and freeze for 2–4 hours for a firmer texture.
How to Make Ice Cream Without an Ice Cream Maker
You don’t need special equipment to enjoy homemade ice cream.
Method 1: No-Churn Ice Cream
This method relies on whipped cream for air incorporation.
Basic recipe:
- 2 cups heavy cream (cold)
- 1 can sweetened condensed milk
- Flavoring
Steps:
- Whip heavy cream until stiff peaks form.
- Gently fold in sweetened condensed milk.
- Add flavorings.
- Freeze for at least 6 hours.
This method produces surprisingly creamy results.
Method 2: Freeze-and-Stir Method
- Prepare a traditional base.
- Pour into a shallow container.
- Freeze for 45 minutes.
- Remove and stir vigorously with a fork or whisk.
- Repeat every 30 minutes for 2–3 hours.
This breaks up ice crystals manually.
Method 3: Plastic Bag Method (Fun for Kids)
- Place ice cream mixture in a small sealed bag.
- Put that bag inside a larger bag filled with ice and salt.
- Shake for 5–10 minutes.
The salt lowers the freezing temperature of the ice, allowing the mixture to freeze quickly.
Popular Homemade Ice Cream Flavors
Once you’ve mastered the base, the possibilities are endless.
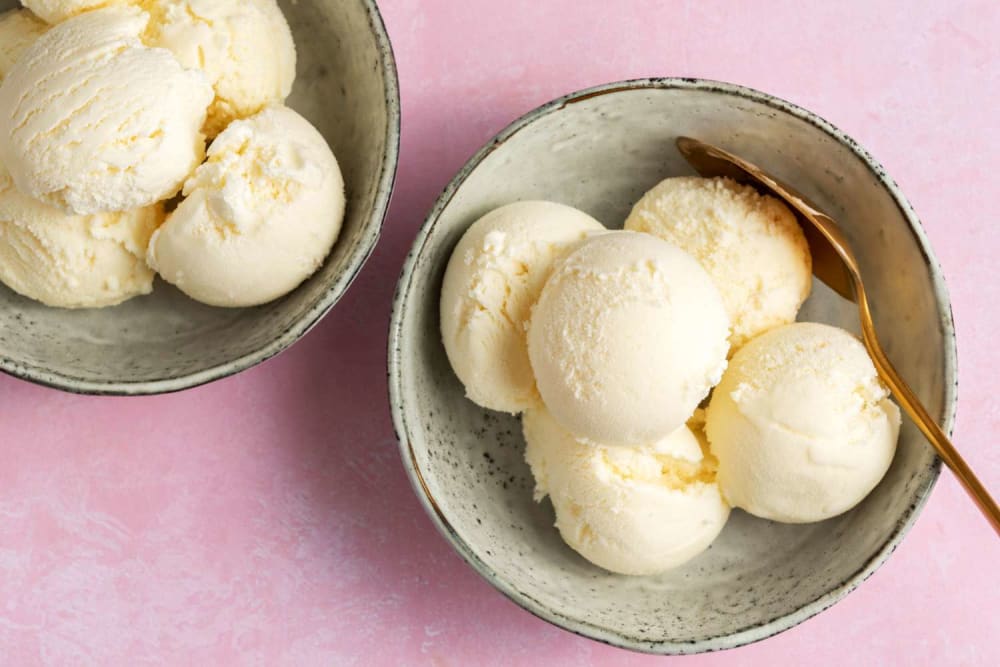
Classic Vanilla
Add 1–2 teaspoons of pure vanilla extract or scrape a vanilla bean into the base.
Chocolate
Add:
- 1/2 cup cocoa powder (sifted)
- Or melted dark chocolate
For deeper flavor, bloom cocoa in warm milk before mixing.
Strawberry
Blend fresh strawberries with sugar and a splash of lemon juice. Strain if you prefer smoother texture.
Mint Chocolate Chip
Add mint extract and fold in chocolate chips during the final minutes of churning.
Cookies and Cream
Crush chocolate sandwich cookies and fold them in at the end of churning.
Salted Caramel
Swirl in homemade caramel sauce and a pinch of sea salt.
Adding Mix-Ins Properly
To avoid sinking or uneven distribution:
- Add mix-ins during the last 2–3 minutes of churning.
- Freeze sticky ingredients (like caramel chunks) before adding.
- Coat fruits or nuts lightly in flour or sugar to help suspension.
Achieving the Perfect Texture
Texture is what separates good ice cream from great ice cream.
Keep Everything Cold
- Chill your base thoroughly.
- Freeze your ice cream maker bowl for at least 24 hours if required.
- Work quickly when transferring.
Balance Fat and Sugar
Too little fat = icy texture
Too little sugar = rock-hard ice cream
If ice cream freezes too solid, increase sugar slightly or add a tablespoon of alcohol (like vodka) to soften texture.
Avoid Over-Churning
Over-churning can cause butter formation. Stop once it reaches soft-serve consistency.
Common Problems and How to Fix Them
Ice Cream Is Too Hard
- Let it sit at room temperature 5–10 minutes before scooping.
- Increase sugar slightly next time.
- Add 1 tablespoon corn syrup or honey to improve softness.
Ice Crystals Formed
- Ensure faster freezing.
- Store in airtight containers.
- Press plastic wrap directly onto surface before sealing.
Grainy Texture
- Sugar wasn’t fully dissolved.
- Custard may have been overcooked.
- Ingredients weren’t properly combined.
Flavor Is Weak
Cold dulls sweetness and flavor. Slightly over-flavor your base before freezing.
Dairy-Free and Vegan Ice Cream Options
You can make excellent ice cream without dairy.
Coconut Milk Base
Full-fat coconut milk provides creaminess similar to heavy cream.
Basic formula:
- 2 cans full-fat coconut milk
- 1/2–3/4 cup sugar
- Flavorings
Cashew Cream Base
Blend soaked cashews with plant milk and sweetener for a creamy vegan base.
Banana “Nice Cream”
Blend frozen bananas until smooth for a simple, healthy alternative. Add cocoa powder, peanut butter, or berries.
Healthy Variations
If you’re looking to reduce sugar or calories:
- Use natural sweeteners like honey or maple syrup.
- Replace some cream with Greek yogurt.
- Use stevia or monk fruit sweetener (in moderation).
- Increase fruit content for natural sweetness.
Keep in mind that reducing sugar significantly may affect texture.
Storage Tips for Homemade Ice Cream
Homemade ice cream lacks commercial stabilizers, so proper storage is important.
- Store in shallow, airtight containers.
- Place plastic wrap directly on surface.
- Keep in coldest part of freezer.
- Consume within 1–2 weeks for best quality.
Creative Flavor Combinations
Once comfortable, experiment boldly:
- Lavender honey
- Espresso chip
- Brown butter pecan
- Mango chili
- Pistachio rose
- Lemon basil
- Peanut butter fudge ripple
Homemade ice cream allows you to tailor sweetness, richness, and flavor intensity exactly to your preference.
Making Ice Cream for Special Occasions
Homemade ice cream is perfect for:
- Birthday parties
- Summer barbecues
- Dinner party desserts
- Holiday celebrations
You can make ice cream cakes, ice cream sandwiches, or layered frozen desserts.
Equipment You May Want
While not mandatory, these tools help:
- Ice cream maker (manual or electric)
- Candy thermometer (for custard)
- Fine mesh strainer
- Silicone spatula
- Airtight freezer containers
Even without fancy tools, great results are possible.
The Joy of Experimentation
One of the best parts of making homemade ice cream is creativity. Unlike commercial production, you are not limited by shelf stability or mass appeal. You can create small batches, seasonal flavors, and unique textures.
Try:
- Toasting spices before adding.
- Infusing herbs into warm cream.
- Swirling sauces after churning.
- Layering different flavors in one container.
Every batch becomes a learning experience.
Step-by-Step Simple Vanilla Ice Cream Recipe
Here’s a reliable beginner recipe.
Ingredients
- 2 cups heavy cream
- 1 cup whole milk
- 3/4 cup sugar
- 1 tablespoon vanilla extract
Instructions
- Whisk milk and sugar until dissolved.
- Stir in cream and vanilla.
- Chill mixture 4 hours or overnight.
- Churn in ice cream maker 20–25 minutes.
- Freeze 2–4 hours until firm.
- Scoop and enjoy.
This base can be customized endlessly.
Why Homemade Ice Cream Is Worth It
Making ice cream at home offers several advantages:
- Control over ingredients
- No artificial additives
- Fresher taste
- Customizable sweetness
- Endless creativity
- Fun activity for families
The texture may differ slightly from commercial brands due to lack of stabilizers, but many people prefer the natural richness and authentic flavor.
Final Thoughts
Learning how to make homemade ice cream is both simple and transformative. With just a handful of ingredients and some basic techniques, you can create desserts that rival premium ice cream shops. Whether you prefer a quick no-churn recipe or a classic custard base, the key lies in understanding balance — fat, sugar, air, and temperature.
Once you master the fundamentals, the possibilities are truly endless. From classic vanilla and chocolate to inventive gourmet flavors, homemade ice cream allows you to express creativity while enjoying one of the world’s most beloved desserts.
So gather your ingredients, chill your mixture, and start churning. The perfect scoop is waiting in your freezer.