Ice cream in a bag is a no-churn method of making ice cream using basic ingredients and two resealable plastic bags. Instead of an ice cream maker, the mixture is frozen by shaking it inside a larger bag filled with ice and salt.
The process relies on freezing point depression, where salt lowers the temperature at which ice melts, allowing the ice to absorb heat from the cream mixture and freeze it into ice cream.
The result is real ice cream — creamy, scoopable, and customizable — made in about 10 to 15 minutes.
Why Make Ice Cream in a Bag?
There are many reasons this method is popular:
- It requires no special equipment
- It’s fast and interactive
- It teaches basic science concepts
- It’s great for kids and groups
- It’s easy to customize flavors
- It’s inexpensive and accessible
Ingredients You’ll Need
One of the best things about this recipe is how simple the ingredients are.
Basic Ingredients for One Serving
- ½ cup milk or half-and-half
- 1 tablespoon sugar
- ¼ teaspoon vanilla extract
- Ice (about 3 to 4 cups)
- Rock salt or coarse salt (about ½ cup)
Ingredient Substitutions
- Use heavy cream for richer ice cream
- Use non-dairy milk for dairy-free versions
- Use flavored extracts instead of vanilla
- Replace sugar with honey or syrup (results may vary)
Supplies and Equipment
You don’t need much, but quality bags matter.
- 1 small resealable plastic bag (quart-size)
- 1 large resealable plastic bag (gallon-size)
- Measuring cups and spoons
- Towel or gloves (optional but recommended)
Step-by-Step: How to Make Ice Cream in a Bag
Follow these steps carefully for the best results.
Step 1: Prepare the Ice Cream Mixture
In the small resealable bag, combine:
- Milk or cream
- Sugar
- Vanilla extract
This mixture is your ice cream base.
Step 2: Prepare the Ice and Salt Bag
In the large resealable bag, add:
- Ice cubes or crushed ice
- Rock salt or coarse salt
Step 3: Combine the Bags
Place the sealed small bag with the ice cream mixture inside the large bag of ice and salt.
Seal the large bag tightly to prevent leaks.
Step 4: Shake, Shake, Shake
Now comes the fun part.
Shake the bag vigorously for 10 to 15 minutes. You can:
- Shake it back and forth
- Toss it gently between people
- Roll it on a towel-covered table
Step 5: Check the Ice Cream
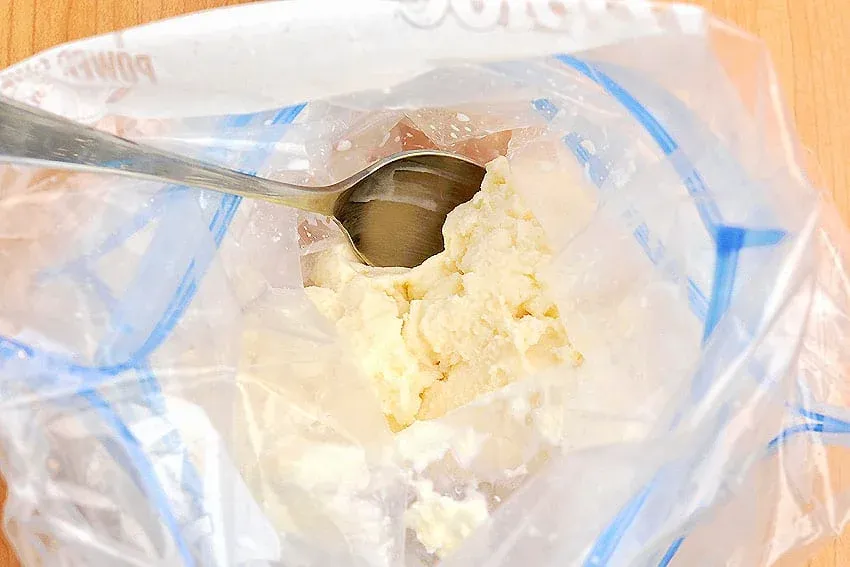
After about 10 minutes, open the large bag and carefully remove the small bag. Check the consistency.
If it’s still liquid, reseal and shake for another 3 to 5 minutes.
When finished, the mixture should be thick and creamy, similar to soft-serve ice cream.
Step 6: Enjoy
Wipe off the outside of the small bag to remove salt residue. Open it carefully and enjoy your homemade ice cream straight from the bag or spoon it into a bowl.
The Science Behind Ice Cream in a Bag
Understanding the science makes the activity even more interesting.
Freezing Point Depression
Salt lowers the freezing point of ice. When salt is added to ice, it causes the ice to melt at temperatures below 32°F (0°C).
As the ice melts, it absorbs heat from the ice cream mixture, causing the liquid to freeze.
Heat Transfer
The shaking motion helps distribute cold evenly and prevents large ice crystals from forming, resulting in smoother ice cream.
Why Sugar Matters
Sugar lowers the freezing point of the milk mixture, preventing it from freezing solid and helping create a creamy texture.
Why Rock Salt Works Best
Rock salt or coarse salt is ideal because:
- It melts ice more slowly
- It creates a colder environment
- It’s less likely to dissolve too quickly
Flavor Variations to Try
Once you master the basic recipe, you can experiment.
Chocolate Ice Cream
Add:
- 1 tablespoon cocoa powder
- Or 2 tablespoons chocolate syrup
Strawberry Ice Cream
Add:
- 1 to 2 tablespoons strawberry syrup
- Or mashed fresh strawberries
Cookies and Cream
Add:
- Crushed chocolate sandwich cookies after freezing
- Gently mix before eating
Mint Ice Cream
Add:
- ¼ teaspoon peppermint extract
- Optional green food coloring
Coffee Ice Cream
Add:
- 1 teaspoon instant coffee dissolved in milk
Making Ice Cream in a Bag with Kids
This activity is especially popular with children.
Educational Benefits
- Demonstrates states of matter
- Shows energy transfer
- Encourages teamwork
- Builds patience and observation skills
Safety Tips for Kids
- Supervise handling of salt and ice
- Use gloves or towels to prevent cold burns
- Double-bag the ice cream mixture to prevent leaks
Common Mistakes and How to Fix Them
Ice Cream Didn’t Freeze
Possible causes:
- Not enough salt
- Not enough shaking time
- Ice melted too quickly
Ice Cream Is Too Hard
Possible causes:
- Too much salt
- Freezing too long
Leaky Bags
Possible causes:
- Weak seals
- Overfilling
How Long Does Ice Cream in a Bag Last?
Ice cream made this way is best eaten immediately. Because it contains no stabilizers or preservatives, it will harden quickly if placed in a freezer.
If stored, it should be eaten within a few hours for best texture.
Scaling the Recipe for Groups
For classrooms or parties:
- Prepare multiple small bags
- Assign shaking roles
- Use towels or insulated gloves
- Label bags with names to avoid mix-ups
Dairy-Free and Allergy-Friendly Options
You can easily adapt the recipe.
Dairy-Free
Use:
- Coconut milk
- Almond milk (may freeze less creamy)
- Oat milk
Sugar-Free
Use:
- Sugar substitutes designed for freezing
- Note: texture may differ
Allergy Awareness
Always check ingredients and avoid cross-contamination when cooking for groups.
How This Method Compares to an Ice Cream Maker
Ice cream in a bag:
- Faster setup
- Smaller batches
- More hands-on
- Less smooth texture
- Larger batches
- Creamier results
- More consistent texture
Turning This into a Science Experiment
You can expand this activity by testing variables:
- Different salt amounts
- Different dairy types
- Different shaking times
- Comparing sugar levels
Frequently Asked Questions
Can I Use Ziplock Bags?
Yes, resealable plastic bags work well. Thicker freezer bags are best.
Can I Use Ice Cream Salt?
Yes, ice cream salt works perfectly and is designed for freezing.
Does It Taste Like Store-Bought Ice Cream?
It tastes like fresh, homemade ice cream with a soft-serve texture. Flavor depends on ingredients used.
Is It Safe to Eat?
Yes, as long as ingredients are fresh and bags remain sealed.
Why Ice Cream in a Bag Is So Popular
This method has remained popular for decades because it:
- Combines science and fun
- Requires minimal equipment
- Produces real results quickly
- Encourages creativity
- Works almost anywhere
Final Thoughts
Making ice cream in a bag is more than just a recipe — it’s an experience. It shows how simple ingredients, basic science, and a little effort can create something delightful. Whether you’re teaching, entertaining, or just satisfying a sweet craving, this method proves that you don’t need fancy tools to make real ice cream.
With endless flavor possibilities and educational value, ice cream in a bag is a timeless activity that’s just as enjoyable today as it has ever been. Shake, freeze, and enjoy every spoonful.