Drawing ice cream is a fun, creative, and beginner-friendly art activity that appeals to artists of all ages. Ice cream shapes are simple, flexible, and forgiving, making them ideal for learning basic drawing techniques while still allowing room for imagination and personal style. Whether you are sketching for practice, creating illustrations, or teaching kids how to draw, ice cream is a perfect subject.
This in-depth guide will walk you step by step through the process of drawing ice cream, from understanding basic shapes to adding details, texture, shading, and color. By the end, you will have the confidence to draw many types of ice cream, including cones, cups, popsicles, and creative cartoon versions.
Why Ice Cream Is a Great Subject for Drawing
Ice cream is more than just a dessert; it is a visual symbol of joy, summer, and creativity. From an artistic perspective, ice cream offers several advantages.
- Simple geometric forms like circles, ovals, and triangles
- Opportunities to practice curves and smooth lines
- Freedom to experiment with colors and textures
- Easy to stylize or cartoonify
- Suitable for both realistic and playful drawing styles
Basic Supplies You Will Need
Before you start drawing, gather a few basic supplies. You do not need expensive tools to create a great ice cream drawing.
Essential Drawing Materials
- Pencil for sketching
- Eraser for corrections
- Paper or sketchbook
- Black pen or fineliner for outlining
Optional Coloring Tools
- Colored pencils
- Markers
- Crayons
- Watercolors or digital drawing tools
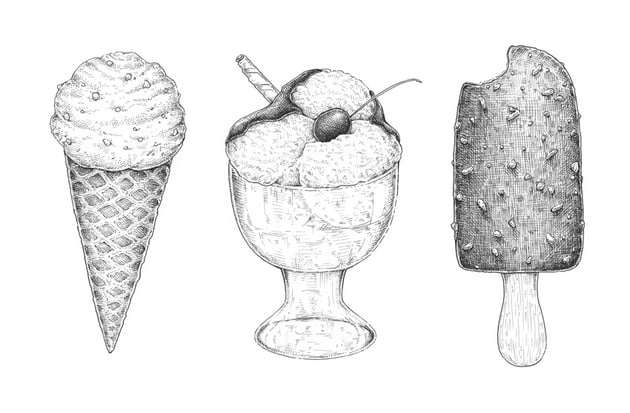
Understanding Ice Cream Shapes
All ice cream drawings begin with basic shapes. Learning to see complex objects as simple shapes is a key drawing skill.
Common Ice Cream Shapes
- Scoops are usually drawn as circles or slightly flattened ovals
- Cones are triangular with a rounded top
- Cups are rectangular or trapezoid-shaped
- Popsicles are long rectangles with rounded corners
How to Draw a Simple Ice Cream Cone
The ice cream cone is the most classic and recognizable ice cream drawing. It is an excellent place to start.
Step 1: Draw the Scoop
Begin by drawing a large circle or oval near the top of your page. This will be the ice cream scoop. Do not worry if it is not perfectly round; natural imperfections add charm.
For a more realistic scoop, flatten the bottom slightly and add small uneven curves around the edges.
Step 2: Add the Cone Shape
Below the scoop, draw a triangle pointing downward. The top of the triangle should slightly overlap the bottom of the scoop. This overlap helps connect the ice cream and cone visually.
Step 3: Add Cone Details
Inside the cone, draw diagonal lines crossing each other to create a waffle pattern. Keep the lines light and evenly spaced.
Step 4: Refine the Outline
Erase unnecessary guide lines and smooth out the edges. At this stage, you should clearly see a scoop of ice cream sitting on a cone.
How to Draw Multiple Scoops of Ice Cream
Once you are comfortable with a single scoop, drawing multiple scoops becomes easy and fun.
Step 1: Stack the Scoops
Draw one scoop on top of another, slightly offset for a natural look. Each scoop should overlap the one below it.
Step 2: Vary the Size
Top scoops are often slightly smaller than bottom scoops. This adds balance and realism to your drawing.
Step 3: Add Drips and Texture
Use small curved lines along the edges of the scoops to suggest melting ice cream. These drips make the drawing feel playful and dynamic.
How to Draw Ice Cream in a Cup
Ice cream cups are another popular variation and offer a different shape to practice.
Step 1: Draw the Cup
Start with a trapezoid shape that is wider at the top and narrower at the bottom. This forms the cup.
Step 2: Add the Ice Cream
Draw one or more scoops above the cup’s rim. Make sure the scoops overlap the top edge of the cup slightly.
Step 3: Add Decorative Elements
You can decorate the cup with stripes, dots, or a logo. This adds personality to your drawing.
How to Draw a Popsicle
Popsicles are simple and perfect for beginners.
Step 1: Draw the Main Shape
Draw a tall rectangle with rounded corners. This will be the popsicle.
Step 2: Add the Stick
At the bottom center, draw a small narrow rectangle for the stick.
Step 3: Add Texture
Add a slight curve at the top and a few vertical lines to suggest shine or ice texture.
How to Draw Cartoon Ice Cream
Cartoon ice cream is expressive and exaggerated, making it ideal for fun illustrations and children’s art.
Step 1: Use Bold Shapes
Cartoon ice cream often uses oversized scoops and simplified cones. Draw large, rounded shapes.
Step 2: Add a Face
Give your ice cream a personality by adding eyes, a smile, and rosy cheeks. Place the face on the scoop.
Step 3: Use Thick Outlines
Cartoon drawings look best with thicker outlines. Trace over your sketch with a pen or bold line.
Adding Details to Your Ice Cream Drawing
Details bring your ice cream drawing to life and make it more interesting.
Sprinkles
Draw small lines or dots scattered across the scoop. Vary their direction and size.
Syrup and Toppings
Add curved lines dripping down the sides to show chocolate or strawberry syrup. You can also draw cherries, nuts, or wafer sticks.
Texture Lines
Light, curved lines on the scoop help suggest softness and volume.
Shading Your Ice Cream Drawing
Shading adds depth and makes your drawing look three-dimensional.
Understanding Light Source
Decide where the light is coming from. The side facing the light will be lighter, and the opposite side will be darker.
Simple Shading Technique
- Use gentle pencil strokes on one side of the scoop
- Darken areas under overlapping scoops
- Add subtle shading inside the cone
How to Color Ice Cream Drawings
Color is where ice cream drawings truly shine.
Choosing Colors
Ice cream allows unlimited color choices. You can use traditional flavors or invent your own.
Common flavor colors include:
- Pink for strawberry
- Brown for chocolate
- White or cream for vanilla
- Green for mint
- Purple for blueberry
Coloring Tips
- Layer colors lightly to avoid harsh lines
- Blend similar shades for smooth transitions
- Leave small white areas to suggest shine
Drawing Realistic Ice Cream
Realistic ice cream requires more attention to texture and shading.
Observe Real Ice Cream
Look at reference photos or real ice cream to study how it melts, reflects light, and forms uneven edges.
Focus on Imperfection
Real ice cream is not smooth or symmetrical. Add small bumps, cracks, and drips to make it believable.
Build Gradual Shading
Use multiple layers of light shading instead of one dark layer. This creates a creamy, soft appearance.
Common Mistakes to Avoid
Even simple drawings can improve by avoiding a few common mistakes.
- Making scoops perfectly round
- Overusing heavy outlines on realistic drawings
- Ignoring shading completely
- Making cones too narrow or too long
Practice Ideas to Improve Your Ice Cream Drawing
The best way to get better at drawing ice cream is regular practice.
Daily Sketches
Draw one small ice cream each day using different styles or flavors.
Style Experiments
Try drawing ice cream in realistic, cartoon, minimalist, and doodle styles.
Theme Challenges
Create themed ice creams like holiday ice cream, fantasy flavors, or animal-shaped ice cream.
Drawing Ice Cream for Kids
Ice cream is an excellent subject for teaching children how to draw.
Keep It Simple
Use basic shapes and encourage creativity rather than perfection.
Focus on Fun
Let kids choose wild colors and silly toppings. This builds confidence and enjoyment.
Praise Effort
Positive feedback helps children develop a love for drawing.
Using Ice Cream Drawings in Creative Projects
Ice cream drawings can be used in many creative ways.
- Coloring pages
- Greeting cards
- Stickers
- Digital illustrations
- School projects
Final Thoughts on How to Draw Ice Cream
Learning how to draw ice cream is an enjoyable and rewarding artistic journey. With simple shapes, playful details, and endless color possibilities, ice cream is one of the most versatile subjects for artists at any level. Whether you prefer realistic shading or cheerful cartoon styles, the techniques in this guide give you a strong foundation to build upon.
The most important thing is to enjoy the process. Experiment with flavors, shapes, and expressions, and let your creativity melt onto the page. With practice and imagination, your ice cream drawings will become sweeter every time you draw them.